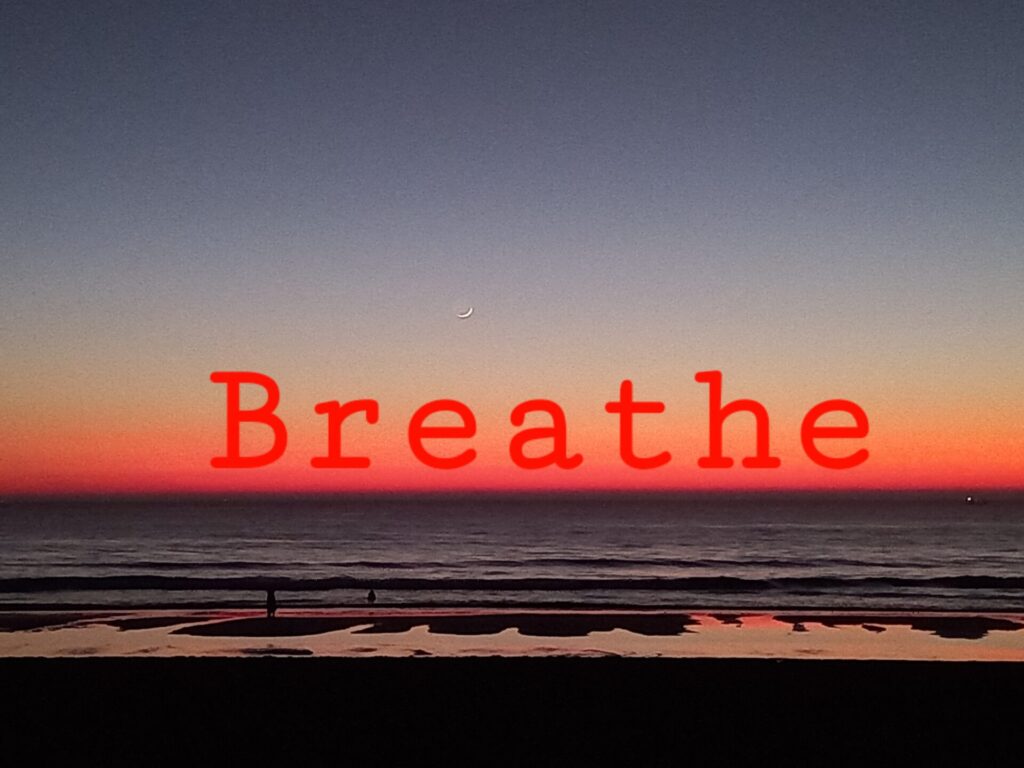
Month: January 2022

A yoga asana guide

Yoga is not about twisting your body up like a piece of spaghetti but maintaining awareness in the movements and can be practiced by anyone, whatever state of mind or health. The word ‘Yoga’ is derived from the Sanskrit word ‘Yuj’, signifying to join, combine or unite, by bringing together the body and mind in harmony through breath control, simple meditation, and the adoption of specific bodily postures. This makes for a strong, clear mind which decreases stress, anxiety, and the need for external validation. So of course, brings about healthy and sound living. In addition, a clear mind increases self-awareness, focus, disciple, physical health, emotional stability, memory, and the ability to empathize with others. It can improve posture, increase flexibility, build muscle strength, boosts metabolism, helps in lowering blood sugar, increase blood flow, keep diseases at bay, and increase self-esteem. So why are you not doing it? I would like to introduce you to a quick but very effective set of postures to get you started, called Surya Namaskar, or Sun Salutation.

We all know how important the sun is and love to feel its heat and vitamin D, but it’s more than just that. The sun has been a source of both spirituality and vitality on the earth since time immemorial. Its significance can be traced from Mayan, Egyptian, Aztec, Tibetan, and Indian civilizations to the ones that emerged later. Spirituality apart, there is also a logical reason behind the sun’s prominence.

Scientifically, the sun radiates energy to the earth in the form of heat and sunlight – without which life couldn’t have sustained here. Sparing just 10 minutes for yourself every day can have dramatic changes in various aspects of your life. Hence, Surya Namaskar, or Sun Salutation, has a range of effects on the human body. There are many variations of the sun salutation, but usually, it consists of 12 postures for the 12 cycles of the sun. I will explain one cycle where in step 4, the left leg goes back first, and in step 9, the right leg comes forward, and in the second set in step 4, the right leg goes back and in step 9, the left leg comes forward. Confused? All it means is steps 4 and 9 are the same posture. So you work one side of the body in the first set and the other side in the second, which makes one cycle and your goal is to do six. Don’t force anything, listen to your body and flow with the movement. Maybe at first, you are unable to do the full posture but I’m sure after a week you’ll be jumping out of bed and whacking out a sun salutation in 10 minutes.

Surya namaskar or sun salutation.

1. Pranamasana (Prayer pose)

Stand straight, keep your feet together and balance your weight equally on both feet. Expand your chest and relax your shoulders. As you breathe in, lift both arms up from the sides, and as you exhale, bring your palms together in front of the chest in a prayer position.

2. Hastauttanasana (Raised arms pose)  

Breathing in, lift the arms up and back, keeping the biceps close to the ears. In this pose, the effort is to stretch the whole body up from the heels to the tips of the fingers.

Tip to deepen this yoga stretch: You may push the pelvis forward a little bit. Ensure you’re reaching up with the fingers rather than trying to bend backward.

3. Hastapadasana (Standing forward bend)

Breathing out, bend forward from the waist keeping the spine erect. As you exhale completely, bring the hands down to the floor beside the feet.

Tip to deepen this yoga stretch: You may bend the knees, if necessary, to bring the palms down to the floor. It’s a good idea to keep the hands fixed in this position and not move them until we finish the sequence.

4. Ashwa Sanchalanasana (Equestrian pose)

Breathing in, push your left leg back, as far back as possible. Bring the left knee to the floor and look up.

Tip to deepen this stretch: Ensure that the right foot is exactly in between the palms.

5. Dandasana (Stick pose)

As you breathe in, take the right leg back and bring the whole body in a straight line. Try to bring your whole body close to the floor, by bending the elbows.

6. Ashtanga Namaskara (Salute with eight parts or points)

Gently bring your knees down to the floor and exhale. Take the hips back slightly, slide forward, rest your chest and chin on the floor. Raise your posterior a little bit. The two hands, two feet, two knees, chest, and chin (eight parts of the body) should touch the floor.

7. Bhujangasana (Cobra pose)      

Slide forward raise the chest up. You may keep your elbows bent in this pose, keep your shoulders away from the ears. Look up at the ceiling.                                        

Tip to deepen this yoga stretch: As you inhale, make a gentle effort to push the chest forward; as you exhale, make a gentle effort to push the navel down. Tuck the toes under. Ensure you’re stretching just as much as you can and not forcing your body.

8. Adho Mukha Svanasana (Downward facing dog pose)

 Breathing out, lift the hips and the tail bone up to bring the body into an inverted V pose.

Tip to deepen this yoga stretch: If possible, try and keep the heels on the ground and make a gentle effort to lift the tail bone up, going deeper into the stretch.

9. Ashwa Sanchalanasana (Equestrian pose)

Breathing in, bring the right foot forward in between the two hands. The left knee goes down on the floor. Press the hips down and look up.

Tip to deepen this yoga stretch: Place the right foot exactly between the two hands and the right calf perpendicular to the floor. In this position, make a gentle effort to push the hips down towards the floor, to deepen the stretch.

Step 10. Hastapadasana (Standing forward bend)

Breathing out, bring the left foot forward. Keep the palms on the floor, bend the knees if necessary.                                                                                                                                                 

  Tip to deepen this yoga stretch: Gently straighten the knees, and if you can, try and touch your nose to the knees. Keep breathing.

11. Hastauttanasana (Raised arms pose)

Breathing in, and slowly roll the spine up. Raising your hands above your head, pushing the hips slightly outward.

Tip to deepen this yoga stretch: Ensure that your biceps are beside your ears. The idea is to stretch up more rather than stretch backward.

12. Tadasana (Mountain Pose)

As you exhale, first straighten the body, then bring the arms down into prayer position. Relax in this position and observe the sensations in your body.

Congratulations!! You have just completed one set of Surya Namaskar. Now balance your body with another set bringing the right leg back first in step 4, and the left leg forward in step 9. If you manage to do one cycle today, that is brilliant, then tomorrow go for 2 cycles and so on until you can complete the full 6. Remember do not force or rush anything, and just let your body flow. Once you have finished, lay down flat on your back, close your eyes and relax your whole body for a few minutes as new energy revitalises your whole being. Roll over onto your side and gently push yourself up into a sitting position. give yourself a big hug for taking 10 minutes to make a better start to your day.

Have a great day.

signature

A Pranayama guide.

From the Sanskrit words Prana (“life force” or “vital energy”) and Yama (“control”), the practice dates back to ancient India since 700 BCE. It includes a variety of breathing patterns and techniques that boost both your physical—respiratory, cardiovascular, metabolic, and your emotional—stress, anxiety, concentration health. Our breathing directly affects our nervous system via the vagus nerve, which governs our fight or flight and rest and relaxation responses as well as our cardiovascular, respiratory, and digestive systems. In other words, the way we breathe controls just about everything. You can also find Prana in food such as ash gourd, honey, coconut, whole grains, beans, lentils, millet, nuts, seeds, fresh fruits, dried fruits, and fresh vegetables.

The benefits of pranayama.

The immune system: Deep breathing activates our digestive tracts, where as much as 80 percent of our immune tissue lives. Breath retention significantly increases our count of white blood cells, which are the first to attack infections and viruses.

Reduce anxiety and depression:  When activated, it increases levels of Gamma-aminobutyric acid, (GABA) in our bodies, the neurotransmitter that helps us unwind.

Respiratory: Breath control improves lung function and capacity for healthy individuals and those with asthma and chronic bronchitis.

Digestive: IBS, diarrhea, and hyperacidity are disorders closely linked to brain activity. These symptoms subside with consistent breathing practice, thanks to its calming effects.

Cardiovascular: pranayama has an immediate and positive effect on your blood circulation, heart rate and blood pressure.

Sinuses: Certain techniques help clear our nasal cavity and create ventilation, improving allergies, sinus infections, congestion, and sinus headaches.

Sleep: Deep breathing slows your heart rate and relaxes your mind. This improves sleep quality and combats insomnia.

Weight loss: Deep and forceful breathing quickens our metabolism and activates abdominal muscles increasing oxygen supply.

Skincare: When we hold an inhale, retained breath supplies oxygen to our skin cells. This increases the blood thrush and detoxifies our blood, improving skin appearance and preventing premature ageing like wrinkles and sunspots.

How to practice pranayama?

The best times to practice Pranayama is with an empty stomach either at dawn, before sunset or sleep, when you’re stressed or tensed. Try to commit to 10 or 15 minutes a day, and slowly build up to longer sessions, but you must listen to your body. Never force or rush the breath, unless it’s part of the technique of course, and if you feel dizzy stop and rest. Loose-fitting cotton clothes allow freedom of movement during the practice.

There are a host of different practices and styles of pranayama, which include lots of techniques and breathing patterns, each with their own unique benefits. The seven different techniques for beginners are Kumbhaka, Kapalabhati, Nadi Shodhana, Alternate Nostril Kapalabhati, Dirgha Pranayama, Ujjayi Pranayama, Simha Pranayama. I will just touch on the first three essential techniques.

First, it would be a good idea to blow your nose, then sit in a comfortable, relaxed position, some Pranayama techniques allow you to lay down. Follow the rhythm of your natural breath then when you’re ready, begin your Pranayama session.

Relax and follow your natural breath.

1. Kumbhaka or “Full Breath Retention”
Best for: An immune boost

“Full breath retention” presents dozens of benefits, like increased lung capacity, brain tissue regeneration, and reduced inflammation. Most importantly, though, it increases oxygen and CO2 levels in our bodies, nourishing our white blood cells to fight off infection and viruses.

Sit or lay down comfortably.  Begin following a 1-1-2 pattern. For example, inhale through the nose for 5 counts, hold for 5 counts, exhale through the nose for 10 counts. With practice, begin to increase the retention (hold) for a ratio of 1-2-2 or 1-3-2.  Soon it will become easier to inhale for 5, hold for 10, exhale for 10. When you feel ready you can increase to inhaling for 5, holding for 15, exhaling for 10, and so on.

2. Kapalabhati or “Skull-Shining Breath”
Best for: Reviving energy and giving you a little glow

Also known as “breath of fire,” this model improves concentration, aids in digestive functioning, quickens our metabolism, and gives you that glowy complexion. It also warms the body, which is good if you’re in a cold place. Practice this one when you need a little energy reboot. 

Sit comfortably (cross-legged or on your knees), resting your hands on your thighs. Inhale and exhale fully through the nose. Then, inhale halfway and begin forcefully exhaling in short bursts through the nose, pulling your belly in. You could place a hand on your belly to feel contraction and expansion. Continue for 20-30 exhales, then breathe in fully, retaining the breath for as long as you can, and finally, slowly exhaling. Repeat the cycle for 10 to 15 minutes, on your last breath bring your right thumb up to your right nostril and exhale through the left nostril.

3. Nadi Shodhana or “Alternate Nostril Breathing”
Best for: Unwinding before bed or trying to calm down

 This technique can lower your heart rate and blood pressure. Try it when you are angry, frustrated, or fed up, just before bed or even before you eat. There are many variations of breathing and nostril holding, but here I will explain the easiest one. 

Sit, with crossed legs or on your knees, or lie comfortably. Bring your right thumb to your right nostril and your ring and pinky fingers to your left. Your index and middle fingers can rest on the bridge of your nose or fold them down toward your thumb. Exhale completely. Using your thumb, press on the right nostril and inhale through the left, then exhale through the left. Close the left nostril, and inhale through the right and exhale through the right to complete one cycle. Repeat for 10-12 cycles.

Take your time, relax and enjoy the flow as prana fills your body with vital energy. Soon you will become more calm and happy, and you will start to notice the beauty and colours of all the things around you that you never noticed before, as you become more mindful and conscious.

Breathe and enjoy.

signature

Happy New Year!

A new years gift ~ A meditation guide

Some people think that mediation is some kind of religious mumbo jumbo or hippy stuff, but in fact, it is an ancient technique to focus and calm the mind. Once the mind is calm you can achieve mental stability, which slows down the turbulent flow of thoughts that run through your head day and night. And an awareness that enables you to see things more clearly, without the projection of your constant flowing thoughts adding stuff. Once you start to slow down the mind and not follow its need to do something, you create a peaceful gap of pure awareness where only love exists Morning is usually the best time to meditate because the mind is fresh and it’s usually quiet, but anytime that you can fit in a quick 5 to 10 minutes is good. At first, do short sessions, maybe 5 minutes three times a day, and then slowly build up to longer sessions. There are many different styles and techniques of meditation but it will be easier to start with a simple but effective breathing one. First, you need to get any jobs done that you need to do and then sit comfortably. If it’s possible you can try this seven-point posture of Vairocana, which should be natural and comfortable, and can be applied for any kind of meditation.

The position of the legs:

  • Sit on a cushion with the back a little higher than the front. It is better to sit crossed-legged in the lotus position, but if it’s too difficult, sit in a half-lotus position. This posture is very stable and allows you to sit for a very long time without moving or getting tired. In the beginning, it won’t be easy but the body will become more flexible, the more you try. If either of these positions is too difficult, just sit comfortably or even on a chair. The most important point is that your spine is straight

The position of the hands:

  • Rest your hands four fingers below the navel; the right hand gently rests on top of the left, with the thumbs touching to form a triangle.
  • Elbows are away from the body so that the air can circulate.
  • The position of the back is the foundation of all postures. It should be straight, the vertebras aligned like a pile of coins.
  • The neck is a little bent forward such as the tip of the nose is aligned with the navel.        
  • The eyes are slightly open with the gaze in the direction of the nose. If opening the eyes brings too much distraction, then close them until you are more experienced. It can be helpful to meditate facing a wall, where the eyes can rest. you should not wear eyeglasses, they may agitate your mind.
  • The tip of the tongue touches the roof of the mouth, behind the teeth and the lips are a little open so that the air can flow easily. It also keeps the mouth from becoming dry and allows saliva to flow down the throat.

Sometimes the second and third points are counted as one, but then the last point is divided in two (tongue and mouth positions). So that we still have seven points. These positions are very important because of the connection (interdependence) between body and mind. The physical conditions affect the mental conditions.

Take a deep breath in, and exhale slowly and fully – pause – then exhale again. There’s always a slight residue left in the lungs. In that residue is the sludge of toxic memory and ego, breath it out. Let them go, and start to feel a deeper state of peace and spaciousness. Then breathe normally, don’t force anything, just notice and invite your body to relax. Feel the sensations it experiencing – the rise and fall of the abdomen, the touch, the connection with the floor or chair. Breathe out any tightness or tension and tune into the rhythm of your breath, just feel the natural flow of breath. In – gap. Out – gap.

Notice where you feel your breath in your body. It might be in your abdomen, your chest, your throat, or in your nostrils. Feel the sensation of the breath – one breath at a time. If you are not able to notice the breath in all areas of the body, that’s fine, we are connected to certain areas of the body than others, at different times of the day. Just focus where you feel it strongest and start your count.

You might start to notice, that your mind is wandering like a fast train or a flowing river running through your head nonstop, or you start thinking about other things. This is normal. Try to notice that the mind has wandered by saying “thinking” or “wandering” then gently redirect your attention back to the breath and start your count again from the beginning. If the need to get up and do that something is too strong, then gently get up, do it with as much awareness as possible and then sit back down again.

Remember the first time you tried to ride a bicycle? It’s a bit like that, you just have to keep trying until you finally get it and ride away. Soon you will notice the gap between the in and out breath. Try to rest your mind in that gap.

Breathe in – gap – breathe out – gap – one. Breathe in – gap – breathe out – gap – two…… until 21.


REST IN THE GAP

Feel your body solid like a mountain and just follow your breath flowing in and out. Leave your mind free and open like space and watch your thoughts like a movie. Soon you will start to learn its tricks and patterns and not act them. Maybe you don’t reach 21 in that session, but the more you practice the easier it will become. When you feel the session is over, offer yourself some appreciation for doing this session and slowly get up and continue your day. Try to find that gap as you move around doing stuff, especially if a negative emotion is about to raise its ugly head, breathe into it, and remember it’s just a movie. Some days your session will go smooth and well, while others it will be difficult, that’s normal. Just keep going slowly up the mountain. Soon you will start to notice how your life is changing positively and your interactions are meaningful and peaceful.

This technique is also very helpful if you can not sleep. Lay flat on your back with your arms by your side, follow your breath as it moves throughout your body. Breath in relaxation, breath out tension/stress – one,….. Breath in relaxation, breath out tension/stress – two, and so on. Soon you’ll be having sweet dreams.

signature